| 1. Planning and Safety |
| 1 |
Coating system selection |
Select a formulation specifically rated for steel and the intended service environment. |
Confirm chemical resistance, maximum service temperature, abrasion resistance, flexibility, and compatibility with the existing steel or primer. Ceramic coatings differ significantly in formulation and performance. |
| 2 |
Work area conditions |
Clean, dry, dust-controlled, and well ventilated. |
Prevent dust, oil mist, condensation, and uncontrolled airflow from reaching the prepared steel or wet coating. Follow the product safety data sheet for ventilation and protective-equipment requirements. |
| 3 |
Personal protective equipment |
Eye, skin, and respiratory protection appropriate to the coating and solvent. |
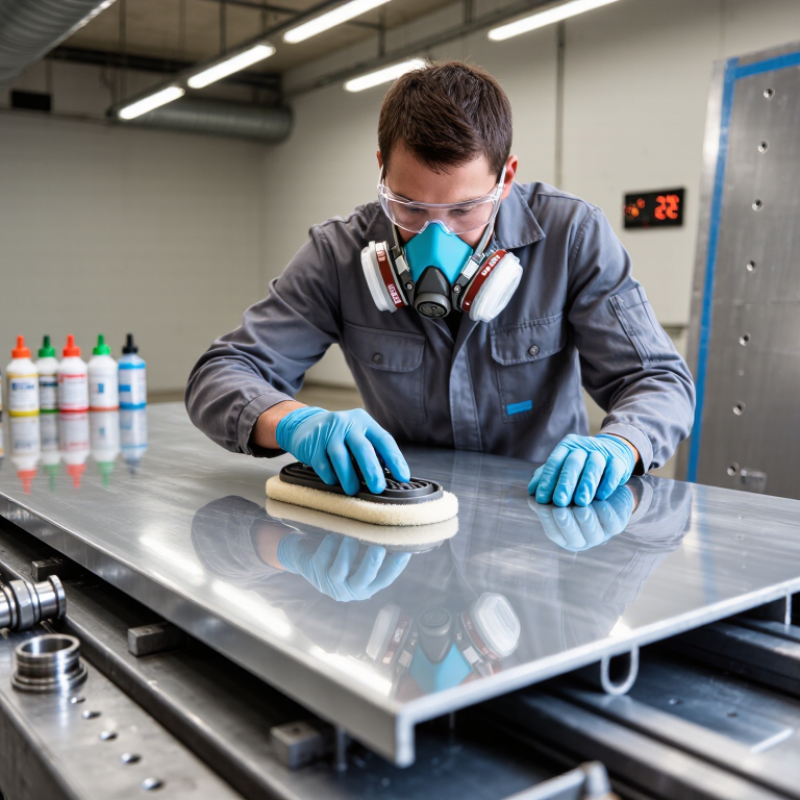
Use chemical-resistant gloves, protective clothing, eye protection, and suitable respiratory protection where required. Do not rely on odor as an indication of safe exposure. |
| 2. Steel Surface Preparation |
| 4 |
Initial inspection |
Identify rust, mill scale, weld spatter, sharp edges, grease, salts, old coatings, and moisture. |
Record defects before preparation. Repair leaks, remove loose material, and determine whether the coating will be applied to bare steel, a compatible primer, or an existing coating. |
| 5 |
Degreasing |
Surface must be visibly free of oil, grease, wax, and processing residues. |
Use a compatible industrial cleaner or solvent method. Replace contaminated wipes frequently and allow the surface to dry completely before abrasive preparation. |
| 6 |
Abrasive preparation |
Common industrial targets range from power-tool cleaning to abrasive blast cleaning, depending on exposure and coating specification. |
For demanding service, abrasive blasting is commonly used to remove rust and mill scale and to create an anchor profile. The required cleanliness grade and profile must be taken from the coating specification rather than assumed. |
| 7 |
Surface profile |
Use the coating manufacturer's specified profile; a commonly encountered range for industrial coatings is approximately 40–75 micrometres. |
Measure the profile using an appropriate comparator or electronic instrument. Excessive profile can cause poor coverage, while insufficient profile can reduce mechanical adhesion. |
| 8 |
Dust removal |
No loose abrasive dust or visible particles should remain. |
Vacuum or use clean, dry, oil-free compressed air. Inspect the surface under suitable lighting before coating. |
| 9 |
Soluble salts |
Keep contamination below the project or coating specification limit. |
Where marine, immersion, or de-icing-salt exposure is expected, test for soluble salts and wash the steel when necessary. Allow the steel to dry fully after water-based cleaning. |
| 3. Environmental Control Before Application |
| 10 |
Steel temperature |
Keep the steel above its dew point by the margin required by the coating specification; a common minimum is 3°C. |
Measure steel temperature, air temperature, relative humidity, and dew point before and during application. Do not coat when condensation is possible. |
| 11 |
Relative humidity |
Use the coating's stated limit; many solvent-based systems specify a maximum near 85% RH. |
High humidity can cause condensation, blushing, slow curing, or loss of adhesion. Follow the technical data sheet for the exact product and application method. |
| 12 |
Substrate moisture |
Steel must be dry unless the product is specifically designed for damp-surface application. |
Remove rain, wash water, condensation, and trapped moisture from pits, seams, and weld areas before coating. |
| 4. Ceramic Coating Application |
| 13 |
Mixing |
Mix components in the specified ratio and within the stated induction and pot-life requirements. |
Use clean equipment and scrape the container sides and bottom while mixing. Do not add thinner or combine partial components unless expressly permitted by the technical data sheet. |
| 14 |
Application tools |
Brush, roller, conventional spray, airless spray, or other approved method. |
Choose the method based on part geometry and the coating specification. Use stripe coating on welds, edges, corners, bolts, and difficult-to-cover details where required. |
| 15 |
Wet film thickness |
Apply within the product's specified wet-film range; do not use a generic thickness for every ceramic system. |
Check wet film thickness during application with a suitable wet-film gauge. Excessive thickness can cause sagging, solvent entrapment, cracking, or prolonged curing. |
| 16 |
Dry film thickness |
Use the coating system's specified dry-film thickness and tolerance. |
Measure cured or sufficiently dried areas with a calibrated coating-thickness gauge suitable for the steel substrate. Verify spot frequency and acceptance criteria against the project specification. |
| 17 |
Recoat interval |
Varies with formulation, temperature, humidity, ventilation, and film thickness. |
Apply the next coat only within the stated minimum and maximum recoat window. If the maximum interval is exceeded, clean and abrade the surface as directed before recoating. |
| 18 |
Curing |
Dry-to-touch, handling, and full-cure times are different and product-specific. |
Protect the coating from water, dust, impact, chemicals, and premature loading until the specified cure has been reached. Lower temperatures generally slow curing. |
| 5. Quality Inspection |
| 19 |
Visual inspection |
Uniform coverage without runs, sags, pinholes, blisters, craters, dry spray, or exposed steel. |
Inspect edges, welds, corners, recesses, and underside areas carefully. Mark defects for repair before the component enters service. |
| 20 |
Adhesion testing |
Use a suitable pull-off or other approved adhesion test when required by the project specification. |
Test representative areas after adequate curing. Interpret results using the coating system's specified minimum value and failure mode, not a universal value. |
| 21 |
Holiday or pinhole inspection |
Low-voltage or high-voltage inspection may be used when specified for continuous protective films. |
Select the inspection voltage and method according to coating thickness and the coating manufacturer's instructions to avoid damaging the film or missing discontinuities. |
| 6. Routine Maintenance |
| 22 |
Inspection frequency |
Inspect at commissioning, after abnormal events, and at planned intervals based on exposure and risk. |
Increase inspection frequency in marine, chemical, immersion, high-abrasion, high-temperature, or heavily trafficked environments. |
| 23 |
Cleaning method |
Use clean water and a coating-compatible, non-abrasive detergent when needed. |
Remove salts, dirt, chemical deposits, and biological growth before they accumulate. Avoid aggressive solvents, abrasive pads, and pressure levels that can damage the coating. |
| 24 |
Common damage indicators |
Chalking, discoloration, gloss loss, scratches, impact damage, blistering, cracking, delamination, and rust staining. |
Document the location, size, likely cause, and severity of each defect. Rust staining or blistering can indicate a breach, contamination, or corrosion developing beneath the coating. |
| 25 |
Chemical exposure control |
Resistance depends on chemical type, concentration, temperature, and exposure duration. |
Remove chemical spills promptly and verify compatibility before using cleaning agents. Do not assume that a ceramic coating resists every acid, alkali, solvent, or oxidizer. |
| 7. Repair of Ceramic-Coated Steel |
| 26 |
Minor surface scratches |
Repair when the scratch exposes the substrate, penetrates the protective film, or is located in a high-risk area. |
Clean the area, lightly abrade the sound coating around the defect, remove dust, and apply the compatible repair material within the specified thickness and recoat window. |
| 27 |
Bare-steel exposure |
Treat exposed steel promptly to prevent flash rust and underfilm corrosion. |
Remove rust and contamination to the required preparation grade, feather the surrounding coating, apply compatible primer if specified, and rebuild the ceramic coating system. |
| 28 |
Blisters or delamination |
Do not simply fill or coat over unstable material. |
Determine the cause, remove all loose coating back to a sound edge, clean the substrate, correct moisture or contamination sources, and reapply the approved system. |
| 29 |
Repair overlap |
Extend the repair onto sound, firmly bonded coating. |
Feather the edges to prevent a sharp transition. The overlap width and preparation method should follow the coating manufacturer's repair procedure. |
| 30 |
Post-repair verification |
Confirm visual uniformity, dry-film thickness, adhesion, and discontinuity repair where applicable. |
Record repair materials, batch information, environmental readings, preparation method, thickness readings, and cure time for traceability. |
| 8. Service-Life Protection |
| 31 |
Mechanical protection |
Avoid dragging, impact, sharp contact, and concentrated loads across the coated surface. |
Use padded supports, protective covers, and controlled handling during transportation, installation, and maintenance work. |
| 32 |
Compatibility with adjacent materials |
Sealants, insulation, gaskets, tapes, and topcoats may contain chemicals that affect the coating. |
Perform a compatibility check or small trial area before full installation. Avoid trapping water or corrosive residues at interfaces and crevices. |
| 33 |
Maintenance records |
Maintain an inspection and repair history for the coated steel asset. |
Record inspection dates, environmental exposure, defects, photographs, cleaning activities, repairs, thickness data, and any changes in service conditions. |